

How To Add An Aftermarket Backup Camera To 2012 Accord
In this commodity: Nosotros'll walk you through the steps to upgrade the OEM head unit of measurement to an aftermarket head unit on your 2008 – 2012 Honda Accord with lots of photos and item.
- 2008-2012 Honda Accord Stereo Upgrade
- Almost the Install
- Tools & Parts
- Step 1 – Prepping Your New Aftermarket Radio
- Connecting Your Harnesses
- Configuring Your CRUX Adapter
- Pre-installing Your Head Unit
- Pace 2 – Removing Your Honda Accord'due south OEM Caput Unit
- Nuance Trim Removal
- Middle Console & Cubby Removal
- Removing the Head Unit and Components
- Step three – Re-installing Your New Aftermarket Head Unit
- Wiring Your Microphone
- Install the Aftermarket Bezel and New Head Unit
- Test Your New Head Unit of measurement and Reinstall Trim
- Additional – Backup Camera Installation
- Wiring Your Backup Camera
- Installing the Camera
2008-2012 Honda Accord Stereo Upgrade
I don't remember anyone would consider driving an older Honda Accordance a thrill by whatsoever means. Yous most likely drive one considering it's a very well priced, reliable and generally a good looking car. But I also don't think that anyone would argue that the eighth generation Honda Accord is a sub-par machine. It'south stylish (relatively) and drives actually well. It's reliable – mine has 125k on it and the only matter I've replaced is the steering pump because I felt like it was making too much dissonance. Information technology's a prophylactic car and has high crash ratings. And for its time the stereo was decent, although I wouldn't consider information technology high-tech.
The Accord'south stereos are but like the rest of the car too – if you don't hammer it all solar day they're going to concluding. But even new versions of the Accord could use an upgrade with one of the latest head units on the marketplace. Since 2012 there'southward a lot that's changed in caput units, Apple CarPlay and Android Machine alone are changing the game in terms of how we integrate our mobile devices into our vehicle'southward technology while on the road. Installing a new aftermarket stereo will brand your commute or bulldoze more enjoyable and bring you up to speed with the recent technology and features.
In this commodity, I'll walk you through the procedure of removing your old Accord's caput unit, prepping your new aftermarket head unit, installing your new aftermarket head unit and installing a new backup photographic camera.
Virtually the Install
- Total installation time: 4-5 hours
- Full Cost for this Installation: $740
- Difficulty: Easy (Weekend DIYer)
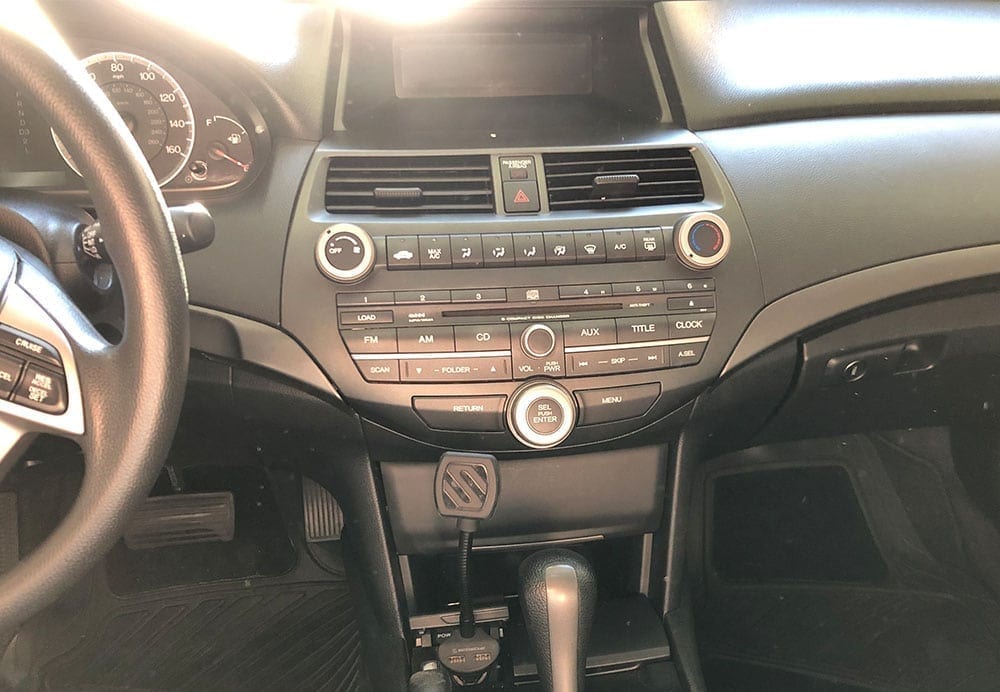
- Vehicle: 2009 Honda Accord LX-Due south Coupe (No Navigation)
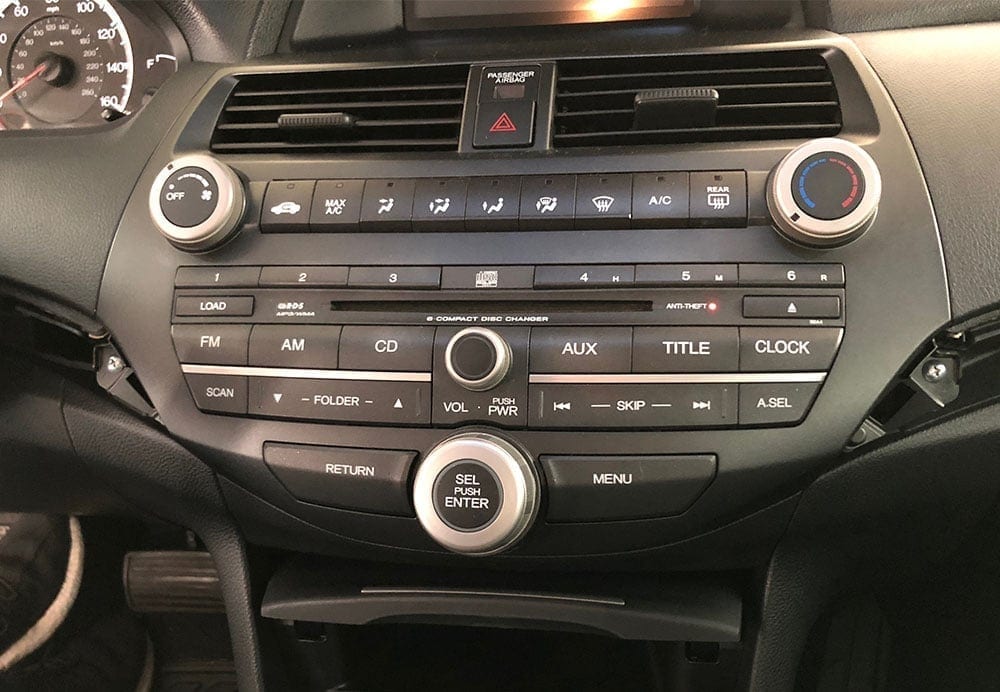
I recently took on my wife's 2009 Accordance as my daily driver. It had near 110k miles on information technology. I commute around 60-65 miles a day, it's paid off.. It made sense. It's an 09 LX-S coupe with the multi-disk CD player. Information technology has no GPS navigation, no bluetooth – only an aux input that'southward in the center console for me to hook my iPhone in. TIMES HAVE CHANGED.
Although in that location was really nothing wrong with the OEM stereo, it simply took a few weeks of driving it to convince myself that it needed an upgrade. Speaker wise, the 6 speaker (including tweeters) arrangement nevertheless sounded not bad so I didn't upgrade them with ane of our recommended six.5 speakers (notwithstanding) and I felt like aftermarket subwoofers would be overkill for the general purpose that I use the motorcar for. Then I decided to upgrade the head unit, and add a backup camera to bring it into the 2020s.
Buy the head unit used in this commodity!
Sony XAV-AX8100 (Latest Model)
Terminal Amazon cost update was: June fourteen, 2022 2:23 pm
Tools & Parts
Permit me list out the tools that I'd recommend for the job along with all of the bodily parts that I used in my Honda's stereo upgrade.
Tools:
- Flathead and Phillips Screwdrivers – $10
- Door Panel Pullers – $10
- Wire Solder Seal Connectors (recommended) – $20 OR Traditional Wire Crimps – $xiii
- Heat Gun (merely if you get the solder seal connectors) – $16
- Wire Strippers – $xiii
Parts:
- Head Unit: Sony XAV-AX8000 – $600. See our Full Writeup & Review of this caput unit and its features.
- Double DIN/Single DIN Nuance Kit West/O Dual A/C: Metra 99-7874 – $40
- Steering Cycle Command & Ability Antenna Adapter: Crux SWRHN-62L – $52
- Backup Camera: AUTO-VOX Cam 6 – $20
- Dash and Center Panel Clips (simply in case): Rexka Center Panel & Radio Dash Panel Retainer Clips (30) – $12
Stride 1 – Prepping Your New Aftermarket Radio
Allow's dig right into it. First step earlier you even begin to touch your OEM radio is to unbox your new aftermarket radio. Inspect it for flaws and ensure that all of the parts you'll need are included. The fundamental office for this step that you'll be utilizing is the manufacturer's wire harness, which you'll tie together to your vehicle specific, CRUX SWRHN-62L harness.
Some installers prep their new aftermarket radios subsequently they've pulled their OEM unit. This is unremarkably to inspect the wire harness and ensure that the parts that you've purchased volition fit the vehicle. Even so, in this case knew the parts that I had matched the vehicle. I normally like to prep all of the new components earlier I begin pulling the OEM parts so that I can immediately move forward with the installation every bit shortly as my OEM parts accept been pulled. It's also a good way to split up the installation time. I did all my prep inside my house the nighttime before I actually installed the head unit and other parts.
Connecting Your Harnesses
After yous're washed inspecting your new parts, pull out wire harness that came with the head unit of measurement and the harness that yous purchased for your Honda. In that location's many ways to secure the 2 harnesses together. My preferred approach has always been to solder each together, followed by shrink wrap. And in the images that I'll show you'll see this. However, you lot can besides use the traditional wire crimps which simply require a crimping tool and wire stripper or you can use the wire solder seal connectors which are my next preferred method. Both of which I've linked to in the tools and parts department.
In this step of the process, y'all're going to take each color-coded wire on the head unit harness and tie it together with the respective/matching color on the CRUX harness. Here'due south a few photos to testify you how I did it (once again using the solder method).
Couple things to annotation when you're connecting the harnesses together:
- Optional: Instead of grounding out the light green wire to your emergency intermission, you can besides ground it directly into the main basis wire (black). This'll allow you to utilize any of the video features that may be limited to only when the vehicle is parked. Some of the newer units will use GPS so this isn't always an end all be all fix. Run into paradigm beneath.
- In that location will be a few unused wires – illumination and dimmer (orangish and orange with white) were both unused for me.
- The powered antennae (big male person plug with a blueish wire hooked to it) will need to be tied to the respective blue wire on the CRUX harness.
And voila! Once you've connected all of your wires, your harness should wait like below and you're gear up to motion onto configuring the CRUX unit.
Configuring Your CRUX Adapter
The CRUX unit was a footling pricy but worth it. At that place's a number of alternative components that you can utilise to adjust your steering wheel controls to an aftermarket application that are universal. But what was dainty nearly the CRUX is that y'all flip a few switches according to the easy-to-read instructions and it's all pre-configured. With universal units, you have to plan the head unit of measurement to lucifer the signal from your steering wheel individually. I idea this was more than straight forwards and honestly not worth the headache of programming every push button on my steering bike to the control within the head unit.
To configure the CRUX unit of measurement (black box), flip it over to expect at the eight miniature switches on the dorsum. Yous'll need to ensure that each of these are in the right position before you install everything in the car. Look at your instructions that came with to find the right configuration. If yous're using a new Sony caput unit the configuration will be:
- Off
- Off
- On
- Off
- Off
- On
- On
- Off
The offset four switches determine the type of radio that yous're installing. So if yous're installing a Pioneer, for instance, the switches would be: 1. Off 2. Off three. On iv. On. The terminal four switches will exist what determines your vehicle. All Honda vehicles take the same last four switches. Here'due south a few photos of how to configure it along with the transmission.
Pre-installing Your Head Unit
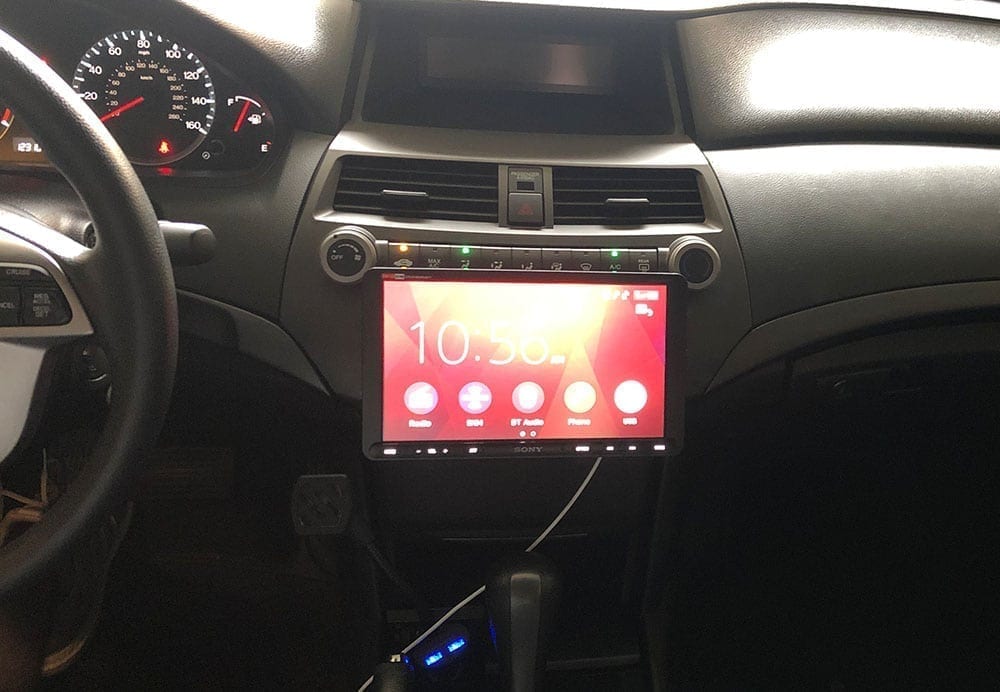
The side by side matter that you lot'll desire to do after you're wrapped up all of the wiring prep is to prep the actual caput unit chassis for installation in your new nuance kit. In my Tools & Parts section, there's a Metra nuance kit. This dash kit is the entire bezel which volition replace the existing bezel that surrounds your climate command and the OEM radio buttons. Since you accept it outside of the car, it'due south an like shooting fish in a barrel job to install the mounting brackets onto your aftermarket radio and test fit it into the new bezel. In my instance, I had to also configure the tilt and height adjustments because the Sony XAV-AX8000 has an oversized monitor that doesn't sit in the dash (see pictures). But, for typical single din and double din installs it's a matter of placing the brackets and ensuring that the depth of the head unit is what you'd expect.
To exam-fit, observe the single din or double din brackets that mount to the side of your head unit of measurement. There should exist two pairs – 1 for a single din chassis and one for a double din. Select the one appropriate to the size of your new caput unit of measurement. Screw the brackets to the side of your new head unit but just snug enough to keep it tight nether low-cal pressure. You may want to adjust information technology once yous test fit it in your new bezel.
Identify the caput unit of measurement into the bezel and ensure that the depth of the head unit is exactly how you'd similar it. If you lot're installing a single din head unit of measurement, the bottom slot volition actually be a compartment so you'll demand to identify that compartment into the bezel prior to inserting your head unit.
Once you're through adjusting your head unit and have the screen (if necessary) and the chassis mounts adapted properly, remove the unit from the bezel and motility to the next step of the installation process.
Stride 2 – Removing Your Honda Accord's OEM Caput Unit of measurement
Dash Trim Removal
First trim that I removed is the trim that's above the glove box. This one is relatively easy – open up the glove box and grab the bottom of the trim with your fingers and pull outwards, starting closest to the head unit on the left side of the trim. 1 past one, pop the clips out on the trim from left to right. This'll betrayal a screw on the bottom right hand side of the OEM head unit.
Next, motion to the pocket-size trim piece between the head unit and the steering column. This one might require a wedge to pull out. I would recommend using a plastic trim removal tool so that you don't scratch the trim. I was able to use my fingers to pull the edge of the trim slice closest to the head unit but you may demand to use a proper tool to pull it if information technology's stubborn. Once this trim piece is removed it'll betrayal another screw for the head unit of measurement.
Once both trim pieces are removed, and the screws are exposed you tin can remove the two screws to the side of the unit. Now, move to the center console and cubby to access the final 2 screws to remove the head unit.
Center Console & Cubby Removal
In order to access the final two screws on your Honda Accord's OEM head unit, you'll need to remove the center console trim and cubby. To do this, start by prying upwards the back side of your center trim piece. The best place to begin prying is from inside center console. Open up your center panel and begin swedging/prying upwards the rear portion of the heart trim piece. First from this point and gently pry upwards until you begin to popular the first few trim clips. Information technology's a lengthy piece of plastic that spans from the center console to the cubby area, but in that location's no screws belongings this slice in. Work your way forward until you reach the shifter.
Once you reach the shifter, you lot'll need to put your car into D1 for the easiest removal of the center trim piece. Put the emergency brake firmly on, and so shift your car into D1 and continue to remove the eye piece until all of the clips are undone. At this indicate, all the clips are undone and the trim piece will be nearly removed with the exception of ane power plug that powers the accessory plug in the forepart compartment. Remove the plug by pulling it from the backside of the panel. Once the plug is removed, you can maneuver the center trim piece around your shift knob and out of the automobile.
Now that you've removed the center trim yous'll see two screws on the bottom of the cubby. Remove these two screws. There are two concluding screws in the top expanse of the cubby. These are difficult run into and even more difficult to remove. Us a brusk screw driver to access and remove these two screws and and so remove the cubby by pulling directly out.
One time you've removed the cubby, you'll now be able to access the final two screws to pull your OEM head unit from within the area above the cubby.
Removing the Head Unit and Components
Now that y'all've removed all of the head unit screws, you can begin removing the caput unit. In improver to screws, the unit also has clips that are holding the plastic trim in. Offset removing the head unit by wedging the bottom border with a apartment surface and begin to pry upwardly, gently. You lot'll hear the clips pop and you should begin to exist able to remove the unit. One time the unit is loose, unclip all of the wiring that is connected to the caput unit, climate control and emergency lights switch and pull the unit out of the dash.
The dash trim has a number of components that y'all'll demand to reuse and behave over to your new Metra dash kit. This includes the vents, climate control and the emergency button switch. To get access to these, you'll demand to remove the caput unit from the plastic trim. Remove the head unit by removing the screws in the back, so move to the climate control unit. The climate control unit of measurement too has a few screws to remove. Once y'all've removed those screws you'll demand to popular off the two control knobs on the confront in order to fully remove the climate control unit of measurement. Run into pictures.
The hazard/emergency button has a few clips holding it in. Gently pry them apart to push button the button out towards the confront of the trim.
Finally move to the vents. Remove the final screws in the one-time trim and pull the vents off. The remaining plastic dash trim should be completely empty and yous should now exist able to place the components back into your new aftermarket dash kit.
Step iii – Re-installing Your New Aftermarket Head Unit
If y'all're not installing an aftermarket backup camera, you're now gear up to reinstall your aftermarket dash bezel and new caput unit dorsum into the machine. If you are installing a fill-in photographic camera, come across the Installing a Backup Photographic camera department.
Wiring Your Microphone
Before you put the head unit of measurement back into the automobile, plug the harnesses in and secure information technology you'll want to wire the microphone up first if yous take i. I normally place my microphones in the headliner closest to the driver side front end colonnade bordering the windshield. So this walk through is based on that position.
Beginning past removing the plastic cover on the left hand side of the dash (see image). This panel has a few clips, start by gently prying the corner to the right, closest to the vent. Once this is removed, yous'll have access to run the microphone wire through and underneath the nuance to the stereo compartment along with through to the pillar of the car to the headliner.
Gently pull the door seal closest to the panel that you but removed, enough to push the microphone wire behind it, in between the metal frame and the dash panel. Run the microphone wire upwardly through the pillar encompass and around through to the windshield facing side of the pillar. Clip the microphone to the headliner.
On the other side of the microphone wire, run information technology through the panel that you pulled, behind the dash and out through the stereo compartment where the head unit will go dorsum in. You tin can zip-necktie the wire backside the dash to the existing wire harness so that it doesn't drop downward into your anxiety. Once y'all've ran the microphone wire into the stereo area, leave about 12 inches of slack and and so bundle and zip tie the slack together so that your wire doesn't look like spaghetti backside the stereo and get in the manner of the install. I zero tied information technology to the metallic sub frame behind where the stereo will sit.
Install the Aftermarket Bezel and New Caput Unit
Once the microphone is wired, you can begin to install your new bezel and head unit. Start with the wire harnesses. Clip your new aftermarket wire harness into the OEM harness. There are two clips – the master that houses all of the wires you joined in the grooming phase and then the power antennae which has a blue wire and a wire with a male plug on it.
At this point, you lot should accept your bezel WITHOUT the head unit installed. Continue the new aftermarket head unit of measurement out of the bezel until you've installed the bezel into the car. Install your bezel by placing it back into the dash the same fashion you lot removed information technology. Be sure to re-connect the gamble/emergency lights button and the climate control. Pull the microphone wire, the caput unit of measurement harness (black plug) and the CRUX male plug for your steering wheel controls all out through the infinite in your bezel in which your head unit of measurement will be installed. In one case your wiring is accessible through the bezel, place the unmarried or double din trim slice into the bezel before you secure the new head unit. This is a slim piece of plastic that comes with the bezel to basically frame the exterior of the head unit once information technology's installed.
Now, take your new aftermarket head unit and plug in all of the wires that you should have hanging out through your bezel. In one case all of the wires are plugged in, place your head unit of measurement into the bezel until information technology 'snaps' into place. Voila!
Test Your New Head Unit and Reinstall Trim
Before you screw your bezel back into place and re-install the trim, be sure that your new stereo works! Plow the motorcar on and run through the cardinal features – brand a phone call, connect your usb device, turn on the radio, etc.
If all checks out, get-go to supervene upon all of the trim back where it came from. In my tools and parts department, I recommended buying some extra trim clips. I wasn't able to notice all of the clips from my center console trim and so I purchased actress and replaced the missing ones before I re-installed all of the trim pieces. I recommend doing this to prevent (or help prevent) vibration noises. Earlier placing your trim and center console trim piece back on, I recommend pulling all of the clips and placing them direct onto the trim slice you're re-installing. Leaving them in the clip pigsty instead of on the trim itself makes installation much more than challenging. If yous place them back on the trim piece they just pop back in like they should.
Boosted – Backup Camera Installation
If y'all're a Honda Accord owner without a backup camera and are looking to add together an aftermarket camera to a supporting aftermarket head unit of measurement, we have you covered. In improver to the head unit of measurement that we installed, nosotros too added a backup camera. In this section, nosotros'll walk through the steps that we took to run a wired backup photographic camera in a 2008 – 2012 Honda Accord.
If you're installing a backup camera at the same fourth dimension as a new caput unit of measurement, continue with this step afterward you are done with Step 2. If you're installing a backup camera to an existing head unit of measurement that supports a fill-in photographic camera feed, consummate Step two through the "Heart Console & Cubby Removal" department first.
For our installation we used an AUTO-VOX Cam 6 license plate camera, but this walkthrough should employ for any other license plate photographic camera or universal wired camera.\
Wiring Your Backup Camera
A wired backup photographic camera requires you to wire reverse signal power and ground, along with a bespeak wire (typically an RCA that connects to the dorsum of your head unit).
The get-go (and most time consuming) footstep is to run your photographic camera'due south signal wire from the nuance to the rear of your car. Start by feeding the point wire through the bottom of the dash near the driver petals into the head unit area of the nuance. Feed the wire through the opening where your head unit will be installed and leave virtually 12″ of extra cable for when you lot plug your head unit of measurement back into the harness and other signal wires.
Run the wire underneath the driver side of the dash in a higher place the petals. I typically volition utilize naught ties to secure the indicate wire to an existing harness so that it doesn't become a hazard while driving. Loosen the door seal that'south to the left of the kick panel (panel that'due south closest to the driver'southward left pes while seated) and run the wire forth the left hand side of the panel underneath the seal.
Next, y'all'll need to loosen the console along the bottom side of the door along with the panel forth the driver side of the rear seats. If you have a iv door, you'll need to run the wire along the column between the front end and rear doors and as well loosen the panel along the lesser side of the rear door to run the wire.
Once yous've run the indicate wire through the driver side flooring panel, you need to wire information technology through to the trunk. To do this, fish information technology through the panel betwixt the rear seat and the body. Start from the trunk side and run your fisher through the trunk into the panel that you loosened before.
Claw the camera signal wire to the fisher and then slowly pull the fisher through the panel to the body.
About cameras require a indicate/power wire to tell information technology when to turn on and when the car is in opposite. The easiest fashion to signal the camera when the auto is in reverse is to tap into positive wire in the reverse lite. To do this, you'll need to pull the panel inside the body to get access to the tail light.
Pull the clips to the panel and remove the panel to gain access to the tail light plugs. I tested the plugs with a voltmeter while the car was in reverse in order to determine which wire was positive and tapped into the wire for the positive source for the camera. You lot can employ a wire tap to do this. For the negative wire, I used an existing basis that was bolted to the frame behind the plastic panel closest to the bumper.
Installing the Camera
Since I used a license plate camera, there was no need to drill holes. If yous choose a camera that does require custom mounting you'll need to notice a practiced location for the photographic camera and mount it. I would recommend above the license plate.
Before y'all mountain the photographic camera (license plate or not), feed the wire through the pigsty in a higher place the license plate and backside the bumper. Behind the plastic, there's a grommet that volition lead directly into the back of the trunk where your positive, negative and betoken wire should already be. Employ a knife or drill to poke a hole in the grommet large enough to run the wire through it and place the grommet back into the hole with the wire fed through information technology. One time it's through the grommet, y'all should be able to admission it from within the trunk area and connect it to the existing wires yous've already ran.
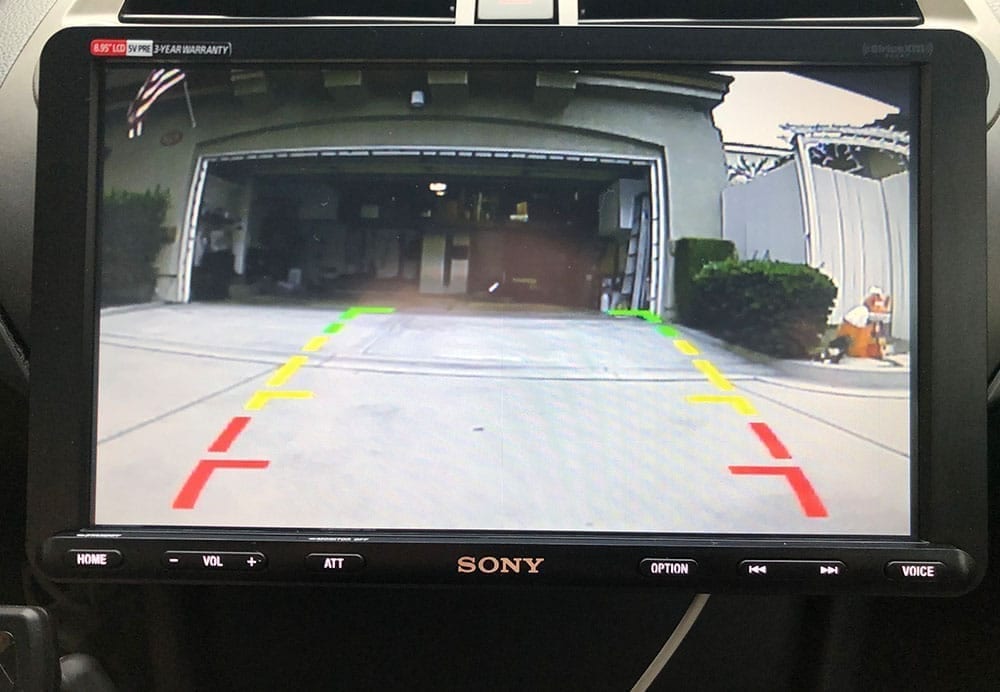
The concluding step is to pull whatever actress wire through the grommet, and mountain your camera. One time everything is plugged in and mounted you're set up to test! Plug in your photographic camera signal wire into the dorsum of your head unit, plow on the car and put it in reverse!
Thanks for reading! Delight utilize the comments beneath if you have whatsoever questions/comments!
Source: https://www.caraudionow.com/2008-2012-honda-accord-head-unit-upgrade/
Posted by: boucherleopragues.blogspot.com
0 Response to "How To Add An Aftermarket Backup Camera To 2012 Accord"
Post a Comment